Did you know that precast concrete steps can last over 50 years with proper installation? That’s why both DIY homeowners and contractors love them! Precast steps are strong, affordable, and save tons of time compared to poured-in-place concrete. But here’s the catch: if they’re not installed correctly, you could face uneven settling, cracks, or even safety hazards.
In this guide, I’ll walk you through everything—from preparing the base to placing and leveling your steps—so you can do it right the first time. Whether you’re a DIY enthusiast or a pro, you’ll find clear instructions, must-have tools, and pro tips to get the job done safely and efficiently. Let’s dive in!
Why Choose Precast Concrete Steps?
Precast concrete steps are manufactured in a controlled factory environment, ensuring consistent durability and quality. In contrast, cast steps can be affected by weather delays or uneven curing. They’re also very affordable—installation can typically be completed in a matter of hours, saving time and labor costs while minimizing project disruption. Transform a residential or commercial entrance in just an afternoon!
Precast steps are also versatile: they’re widely used on residential porches, backyard patios, outdoor landscaping, and high-traffic commercial spaces. Their simple, uniform design enhances curb appeal while providing long-lasting stability and safety.
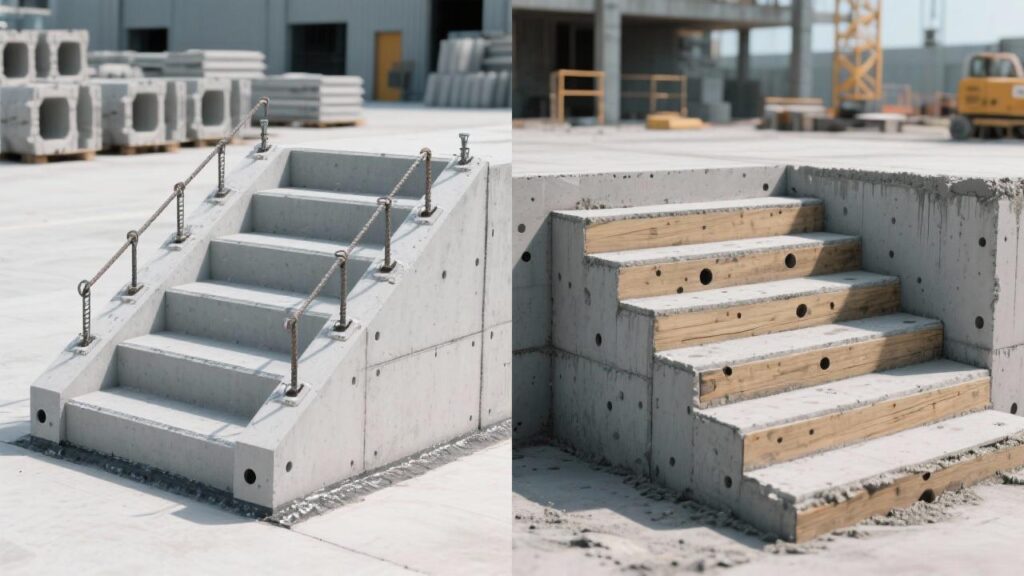
Tools and Materials
A successful precast concrete step installation begins with thorough preparation. Key tools include a level for precise alignment, a shovel and tamper for base preparation, and rebar and trowels for reinforcement and adjustment.
Essential materials include a compacted gravel base to ensure drainage, concrete pads to prevent settling, durable precast steps as the primary structure, and sealant to protect against moisture and wear. Preparing all materials in advance streamlines the installation process, minimizes errors, and ensures a durable, professional-looking finish. Thorough preparation is the foundation for long-term success.
Preparing the Base for Precast Steps
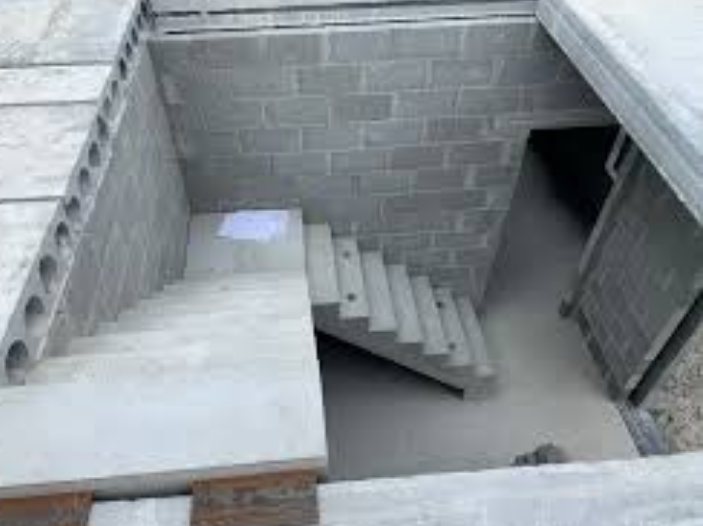
A solid foundation is the foundation for any successful prefabricated step installation. First, excavate the site to the appropriate depth, removing loose soil, tree roots, and debris. Ensure the surface is level and slopes slightly away from the structure to allow for drainage. Next, lay a 4- to 6-inch layer of crushed stone and compact it thoroughly with a tamper or plate compactor to create a stable, well-drained subgrade. For added strength, rebar can be placed within the excavated area to reinforce the foundation and minimize the risk of cracking or shifting over time. Once reinforcement is complete, a concrete pad is poured over the compacted crushed stone, carefully smoothing it to match the size of the step.
Step-by-Step Installation Process
First, safely remove all old steps, breaking them into manageable pieces and thoroughly clearing the site to prevent uneven settlement in the future. Once the base has been prepared and cured, install the new prefabricated steps using appropriate equipment—smaller steps can be manually installed with assistance, while larger steps often require a crane to safely and precisely position them. Once the steps are in place, use a level to check alignment and stability, ensuring that each riser is evenly positioned and flush with the adjacent surface. If fine-tuning is necessary, insert shims or apply mortar under the steps to achieve a perfect fit. This not only ensures safety but also enhances the professional appearance of the installation. Once installation is complete, inspect all joints to confirm the steps are secure and fill any gaps to prevent shifting. By carefully following these steps, you’ll create a durable, stable, and beautiful entryway that will last for years.
Common Mistakes to Avoid
Even the best precast concrete steps can fail if installed incorrectly. One of the most common mistakes is placing the steps directly on the soil without the proper concrete pads—this can lead to uneven settlement, cracks, and ultimately, costly repairs. Another common issue is overlooking drainage and grade requirements; without a slight slope between the steps and the structure, water can pool underneath, causing erosion and long-term instability. Patience is equally important—skipping the curing time for the concrete pads before laying may initially save a day, but it will compromise the foundation’s strength and shorten the lifespan of the steps. Finally, using incorrect lifting techniques is not only dangerous but can also damage the precast elements themselves. Always use the proper equipment, whether it’s a crane for larger steps or safe teamwork for smaller ones. Avoiding these pitfalls may seem simple, but they can mean the difference between a quick fix and a long-lasting installation.
FAQ
Can I install precast steps without using concrete pads?
Technically, yes, but it’s not recommended. Placing steps directly on soil often leads to uneven settlement and long-term instability. Concrete pads ensure durability and proper load distribution.
How long does it take to install precast steps?
Once the base is prepared, installation is surprisingly quick. Smaller steps can be installed in just a few hours, while larger ones may take a full day (requiring equipment). Precast steps save a significant amount of time compared to cast-in-place steps.
What is the average cost of precast concrete steps?
Prices vary depending on size, design, and customization. On average, standard precast steps range from a few hundred dollars to over a thousand dollars, excluding installation. While the upfront cost may be higher than cast-in-place steps, the time saved often offsets the labor costs.
Can precast steps be customized in design or size?
Of course. Many manufacturers offer custom sizes, finishes, and even integrated railings to match specific architectural styles. Customization ensures both functionality and appeal.
Conclusion
Precast concrete steps are one of the smartest investments you can make for your home or project—they’re strong, cost-effective, and quick to install. By following the right base preparation, installation steps, and safety precautions, you’ll ensure a durable, professional finish that lasts for decades.
Ready to start your project? Take the first step today—prepare your tools, secure your materials, and follow this guide to install precast concrete steps with confidence. Safe building!